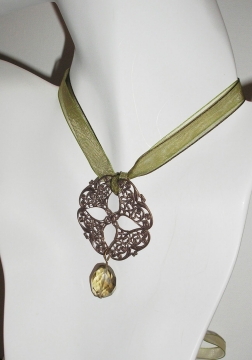
Vintage Filigree Pendant
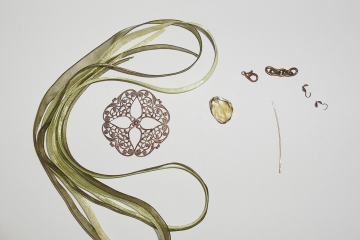
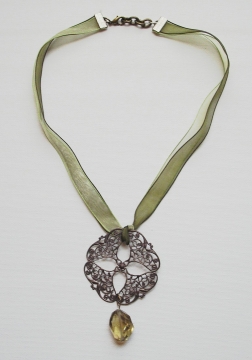
About This DesignTime: Approximately 15-30 minutes Level of Difficulty: Beginner - All Levels Cost: Varies, depending on materials selected. Approximately $15-20 as shown. The vintage look is still going strong! I wanted to take advantage of a great vintage- looking brass finding to make this vintage filigree pendant. I simply attached the finding to ribbon, attached a lemon quartz drop bead as an accent, and attached a clasp and in just minutes I had a fantastic piece of vintage-look jewelry! You can make your own pendant by re-using a real vintage or antique finding, repurposed into a new design, or there are many vintage looking findings available for sale in bead stores and on-line. Want to make this necklace, or a variation of it for yourself? Let's get started! Step 1Gather Supplies
Need Supplies? Check my Jewelry Supply pages to find what you need!
Step 2Attach the bead drop to the pendant Slide your accent bead onto a head pin, and attach it to the bottom center of your finding used a closed loop. Follow these instructions if you need help learning to make a loop. Step 3Attach the ribbon to pendant and attach the ribbon cord ends Cut the ribbon to desired length. I used two pieces of ribbon, 15 inches long (38 cm) so it would be a choker length. Slide the filigree pendant onto the ribbon and tie a simple overhand or square knot to secure it in the center. Insert ribbon ends into cord ends. NOTE - I started trying to make this design using clamshell bead tips, but I had too much trouble trying to feed two ribbons through the tiny holes. So, I switched to the fold-over crimp ends instead. If you need help learning how to work with ribbon, follow these instructions. Pinch the tab cord ends closed using your flat or chain nose pliers so it holds the ribbon tightly. Follow the instructions below for how to attach cord ends for the type of cord ends you have selected. How to Attach Spring Cord Ends Repeat, attaching the ribbon to ends on the other side of the necklace.
Step 3Attach clasp Use your pliers and open jump rings to attach the cord ends to your choice of clasp. Open the jump ring, slide it onto your cord end, and onto your clasp, then close the jump ring. I used a length of bulk oval link chain (as an extender chain) on one side, and a lobster claw clasp on the other. You can use any style of clasp, or clasp with extender chain that you like. Follow these instructions for opening and closing jump rings.
That's it, your new Vintage Filigree pendant is ready to wear!
|
Home How To Make Jewelry Jewelry Basics Jewelry Projects Designer's Gallery Jewelry Supply Jewelry Business Jewelry Books and More Contact Me Privacy Statement Copyright 2006 Smart Sisterz LLC |


