Red Crystal Filigree Bracelet
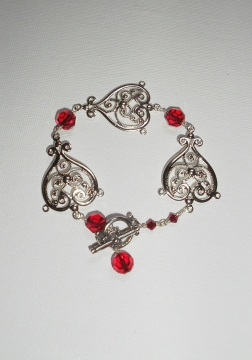
About This DesignTime: Approximately 30 minutes - 1 hour Level of Difficulty: Beginner - All Levels (some wire wrapping) Cost: Varies, depending on materials selected. Approximately $15-20 as shown Want to make a pretty red crystal filigree bracelet in a short amount of time? If you want to make quick and easy bracelet that still offers lots of detail, try using cast filigree components. Here I have attached three heart shaped silver plated filigree findings using red Swarovski crystal beads and a pretty toggle clasp. Using a simple wire wrapping technique to attach the crystals, this feminine bracelet was done in less than an hour. Note - Red crystals are a nice substitute for ruby, the July birthstone. Want to make this bracelet, or a variation for yourself? Let's get started!
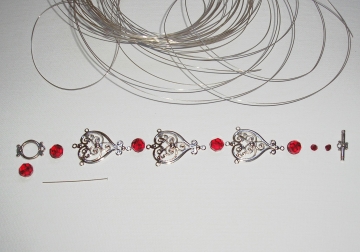
Step 1Gather your supplies.
Need Supplies? Check my Jewelry Supply pages to find what you need
Step 2Determine overall design and bead placement Depending on the size of your filigree components, you may need to add or remove components and beads to make the bracelet the proper length. Lay out your design on a bead board or with a ruler to check spacing before beginning your design. Allow a gap for the wire wrapping in-between each bead. I decided to use two smaller crystals on the end of my bracelet because they fit through the toggle clasp easier on that end.
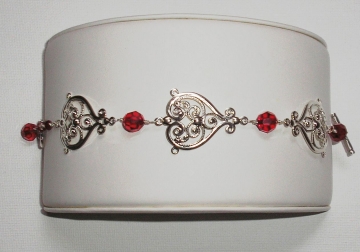
Step 3Attach beads and components together Cut several lengths of sterling silver half hard wire. Begin attaching the beads and filigree components together, forming a bracelet chain. Alternate beads and components, or mix it up creating your own unique design. If you like my pattern, my bracelet was crafted in this order:
TIP - Keep checking the overall length to make sure your design is working to keep within your desired bracelet length. Allow room for attaching the clasp. Once you reach the end sections, attach the clasp to either end of the bracelet chain using the same wire wrap technique. Follow these instructions on how to wire wrap chain Step 4Attach charm bead I always like to add a little detail to my bracelets, and in this design we will attach one bead charm to the toggle clasp as a way to balance the color and complete the design with that added touch. Slide one or more red crystals onto a headpin and make a loop at the top with your round nose pliers. Loop this through the round end on the toggle clasp and close the loop. If you need help with this technique, click here to learn more.
That's it! Your new bracelet is ready to wear!
|
Home How To Make Jewelry Jewelry Basics Jewelry Projects Designer's Gallery Jewelry Supply Jewelry Business Jewelry Books and More Contact Me Privacy Statement Copyright 2006 Smart Sisterz LLC |
Join our Newsletter for more free jewelry design projects and tips each month!
Love bracelets? Check out this great book!


