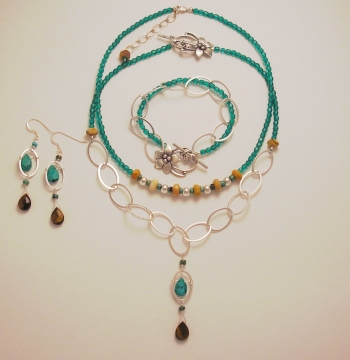
Link Chain Earrings Project
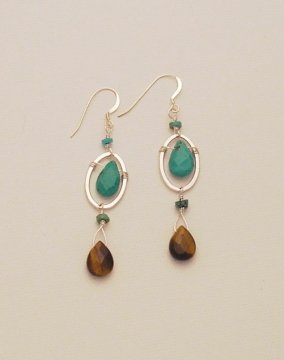
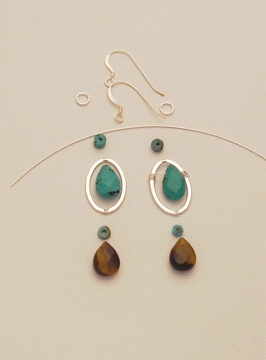
About This DesignTime: Approximately 1 hour Level of Difficulty: All Levels (with Basic Wire Wrapping Knowledge) Cost: Varies, depending on materials selected. Approximately $10-15 as shown. These earrings take advantage of the new larger link oval chain in sterling silver that is now available in bulk lengths from many popular jewelry suppliers. In this design, I have wire-wrapped a turquoise briolette bead inside one of the wire links, to create a focal point in the earring drop. Accents of a tiger's eye briolette bead, and some heishi turquoise beads complete the design, along with a sterling silver hook earwires. Want to make these earrings, or a variation for yourself? Let's get started! Step 1Gather your supplies
Need Supplies? Check my Jewelry Supply pages to find what you need!
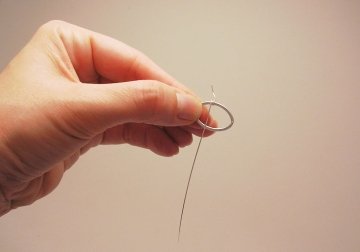
Step 2Begin the Earring with Briolette Wrapped in Center Snip through a link in the oval chain so you can remove the solid link that you need to make the earring. Let's start by making the focal of the earring. Cut a short length of sterling silver wire, about 4 inches. TIP - If it is too long, you won't be able to wrap it inside and around the oval link. First, you'll want to eyeball where your briolette will sit inside the link. Place your briolette bead inside the link and determine where you will attach the bead to the link. Begin wrapping the wire around one side of the oval link. Wrap it using your flat nose pliers to pull the wire tight. Go around the link 2-3 times, and trim off the end, tucking in the rough end with your pliers.
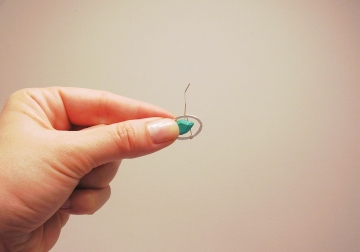
Step 3Attach Briolette Bead to Link Slide your briolette bead into place in the center of the link. This next step will be a little more difficult to wrap because you have less room. Snip the wire so you have just enough to wrap it 2-3 times around the link (about an inch), and begin wrapping the wire around the link, using your flat nose pliers to get leverage and pull the wire so it is tight and the briolette bead is positioned where you want it. Cut off the end of the wire and tuck in the rough piece with your pliers.
Step 4Attach Next Briolette Bead to Bottom Next we will wire wrap the bottom briolette bead (use the How to Wire Wrap a Briolette Instructions if you are not familiar with this technique). Wire wrap the lower briolette bead. Before completing the loop at the top and attaching it to the bottom of the oval link, add an accent bead. I used a heishi bead as my accent. Step 5Attach to Earring Components Complete the loop on top of the briolette bead while attaching it to your earring component using your flat nose pliers. That's it!
Variations and OptionsHere, I have made a matching set of earrings, and a bracelet. This makes a nice set!
More Ideas If you don't have briolette beads, you can easily vary this design by using 2-3 smaller beads of any shape inside the link frame. Or, try attaching a "spray" of tiny beads to the bottom of the link. |
Home How To Make Jewelry Jewelry Basics Jewelry Projects Designer's Gallery Jewelry Supply Jewelry Business Jewelry Books and More Contact Me Privacy Statement Copyright 2006 Smart Sisterz LLC |
What's New?
Coming Soon! Join our Newsletter for free jewelry design projects each month!
