Basic Jewelry ToolsTo make a vast majority of the jewelry on this website, you will really only need a few basic
tools such as Jewelry Pliers: Of course if you're a serious jewelry making hobbyist (or a professional!), there are a whole slew of other jewelry tools you might eventually want to pick up, and these tools will become important if you plan to make a lot of jewelry or if you plan to specialize in making a certain type of jewelry. For example, there are tools that assist in knotting if you plan to make stringed jewelry such as strands of pearls. There are specialized tools that assist in jewelry
wire wrapping Also, just like with any other tool, jewelry tools come in a variety of price ranges depending on quality. If you are a beginning jewelry maker, just start with a basic inexpensive jewelry tool set. If you find you are making a lot of jewelry, or you plan to run a jewelry business, you will want to invest in some top quality tools that will last a lifetime. Some high end jewelry tools also have ergonomically designed features that can help prevent excessive hand and wrist strain. Other things to consider adding to your jewelry making arsenal will include a
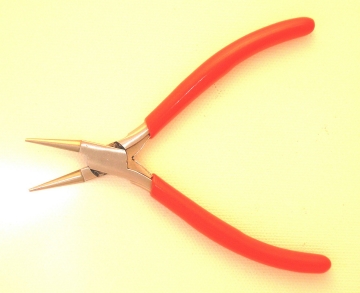
well-lit workspace, so you might consider purchasing a bright craft light You'll want to set yourself up so it isn't a pain in the neck (literally!) to make jewelry. Get a comfortable chair, and make sure you have a table that is high enough so you can easily work with your jewelry. If you need to, pick up magnifying lenses (some of the craft lamps have them built into the hood) or wear glasses if you need them. This is tiny, detailed work and you don't want to strain your eyes. Again, if you suffer from joint pain or arthritis, it might make sense for you to invest in the more expensive tools with comfort features. It is important that you are comfortable and not hunched up while making jewelry, so spend a little time making sure your jewelry workstation is set up for optimum ease of use. Basic Jewelry Tools, Defined:Round Nose PliersThese round nose pliers
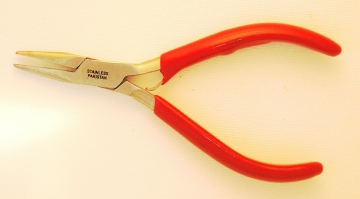
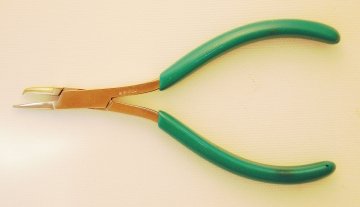
Flat or Chain Nose PliersFlat nose pliers, also known as chain nose pliers
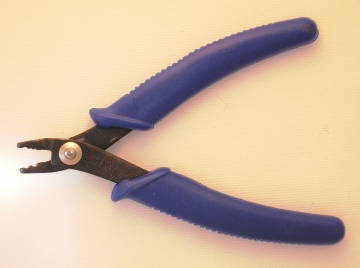
Crimping Tool or Crimping PliersIf you plan to use crimping beads, then these crimping pliers
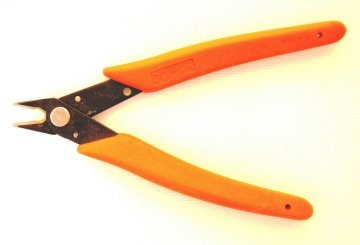
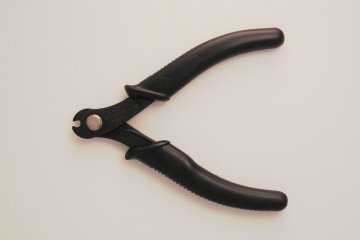
Wire Cutters or Flush CuttersWire cutters, also called flush cutters
Split Ring PliersYou know those little rings that look like miniature key rings? These are split rings and they work the same way as a key ring--you separate one end and slide your split ring onto whatever you are trying to attach it to. You know how hard it is to put keys on your key-ring without it slipping off or breaking a nail? Well, let me tell you--working with miniature little split rings is even worse! These split ring pliers
Memory Wire ShearsMemory wire jewelry is great because it is so simple to make. Simple, as long as you have memory wire shears
Nylon Jaw PliersIf you plan to work with a lot of jewelry wire, these smooth
nylon jaw pliers Bead ReamerI can't tell you how many times I have gone to make a beaded bracelet or necklace, only to discover that the diameter of the bead holes on my beads are not large enough to accommodate my stringing material. Argh! When this happens to you, it's a bead reamer
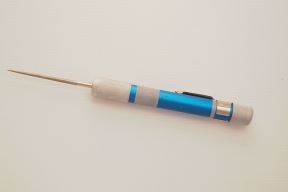
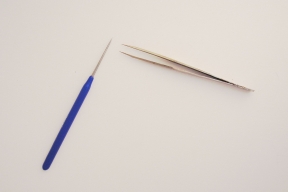
Jewelry Awl and Jewelry TweezersA jewelry awl is like a needle on a stick. It allows you to position beads and hold thread while pulling knots tight, used especially for stringing pearls and other knot-work. It's also handy if you need to untie a knot. Tweezers work the same way.
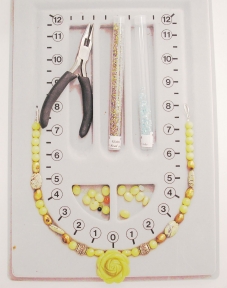
RulerA ruler comes in very handy for measuring bracelets, etc., especially if you aren't using a bead design board. I use a nice 18 inch stainless steel ruler, myself. Jewelry Design Board or Bead BoardA jewelry design board, or bead board
Bead MatA bead mat
Task LightingIf you can afford to, purchase a craft lamp that provides bright natural spectrum light. While this is not completely necessary, they are great for seeing the “true” color of your designs and also for reducing eyestrain. A highly recommended brand of craft light
is the Ott
light, but any bright natural bulb should work if you can't afford to splurge on a specialty lamp.
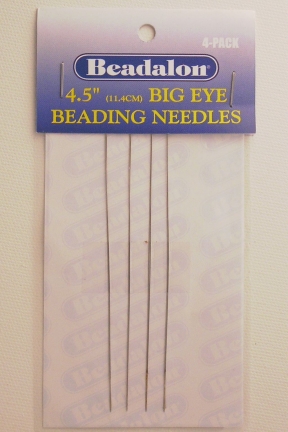
Sunlight, of course, is always a great alternative if you have a window where you can place your jewelry table. Thread ScissorsThread scissors are small scissors designed for cutting thread. They have nice small sharp tips and are easier to use on fine thread than your normal larger scissors. Flexible Beading NeedlesBeading needles are special needles with an eye that will collapse so you can pull it through the beading hole. Big Eye Beading NeedlesThis is a long skinny needle with a broad opening in the middle that opens for easy threading.
Thread ConditionerThread conditioner (also try beeswax) is sold under several brand names and is used with silk cord and thread. It conditions the thread so it doesn't fray and it also makes it easier to handle. Polishing Cloth, Anti-Tarnish Strips, Silver CleanerSilver polishing cloths can be used to remove tarnish from silver jewelry. Silver cleaner is usually sold as a dip and you can easily clean your silver jewelry this way. Anti tarnish strips can be placed in storage or in the box with your components to prevent tarnish from forming over time. Specialty Jewelry Tools & EquipmentPolymer Clay ToolsIf you plan to make your own polymer clay beads, some additional tools will come in handy. You can buy a set of polymer clay jewelry tools wherever polymer or modeling clay is sold. These kits usually have a plastic roller, a cutting blade or tool and potentially some mold forms. You will also need something to bake and cure the clay. Due to the potentially noxious fumes that are created while the clay bakes, you never want to use your home oven for this unless you are prepared to thoroughly clean the oven after each use. It isn't recommended, especially because you can just use a cheap toaster over and not have to worry about it! Silver Clay or PMC ToolsIf you want to work with silver metal clay, you will want similar tools to polymer clay. Basically you will want to roll your clay out with a roller, cut it using any x-acto knife or cutting tool, fire it using either a jeweler's torch with stand, a kiln, or a specially made PMC Hot Pot, and then you will need to finish your piece by polishing it. If desired, you can also dip your piece in oxidizer if you want to fill in gaps with a blackened finish. Additional tools you might want for working with metal clay include specialized texturing plates, and if you want to make rings, a set of ring forms especially made for working with metal clay, or a ring mandrel will come in handy. MetalsmithingMetalsmithing is fun and very rewarding. I'll never forget the first time I soldered something (or the second time because the first time it didn't stick...) or the time I created my very first sterling silver ring completely designed from scratch! We won't go into metalsmithing too much on this site beyond the basics, but if you plan to take up advanced jewelry design in the form of metalsmithing, you will need at least a starter set of metalsmithing tools. When setting up your metalsmithing shop, expect to spend anywhere from $100 - 1000 on tools and supplies, depending on how extensive a set-up you need. These tools include:
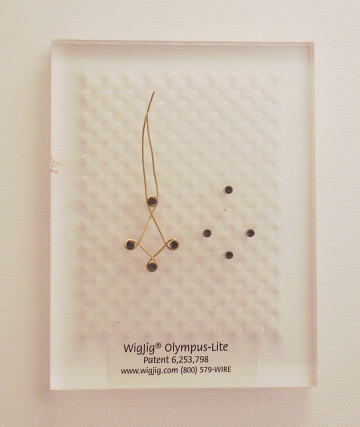
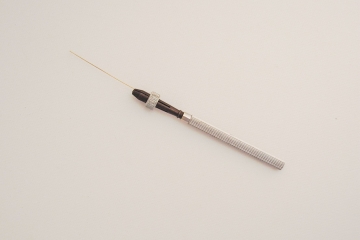
jeweler's saw and blades,jeweler's torch Wire Wrapping ToolsIf you plan to take up advanced wire wrapped jewelry, such as making your own intricate wire wrapped designs, you might want a few additional tools in addition to the basic set of pliers and cutter. These would include a pin vise, used for holding metal wire while twisting it, a small bench vise for holding the designs as you work, and a ring mandrel (for accurate sizing) if you plan to make rings. You will also want a file for smoothing rough edges of the wire. A very popular tool for wire wrapping jewelry is a jewelry wig jig, which is a pegboard with pins, and you simply wrap the wire in different patterns around the pins to produce your design. If you'd like to get some ideas, view thousands of WigJig projects on the WigJig website. ("WigJig - 1,800 free web pages with designs and instructions for making jewelry. Online store for purchase of beads, tools, wire and jewelry supplies.")
WigJig for Wire Wrapping Designs
Pin Vise for Twisting Wire
|
Home How To Make Jewelry Jewelry Basics Jewelry Projects Designer's Gallery Jewelry Supply Jewelry Business Jewelry Books and More Contact Me Privacy Statement Copyright 2006 Smart Sisterz LLC |
Start Your Own Home Jewelry Party Business Today!
Join our Newsletter for more free jewelry design projects and tips each month!
