Step-by-Step Basic Wire Wrap Jewelry InstructionsMaking a Basic LoopOnce you learn this basic technique for making wire wrap loops, you will be making tons of amazing wire wrap jewelry in no time! It is not as hard as it looks and only takes a little practice to make you a pro. Just follow my step-by-step wire wrap jewelry instructions, and don't be intimidated, your loops do not need to be perfect, really!
What you will need:
Step 1
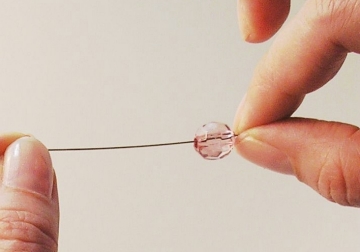
String your bead onto a head pin. Hold the bead flat to the bottom of the head pin and bend/fold the wire over at a right angle, right across the top of your bead. You can either fold the wire with your pliers, or just push it with your fingers.
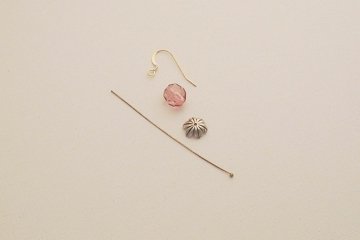
We'll demonstrate this technique by making an earring. Gather your components:
Slide a bead onto a headpin:
Step 2
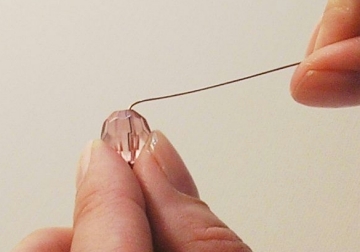
Option 1 - If you just plan to make a basic round loop, grasp the wire and bend it flat to the top of the bead at a right angle.
Press the wire down with your thumb and fingers so the wire is flat and parallel to the top of the bead:
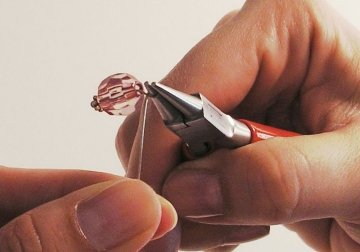
Step 3Now, you will begin creating a round loop with your pliers. Grasp the wire about 1/4 inch from the bend with your thumb and palm facing up, and with a twist of your wrist forward, roll the wire up and around, trying to make a nice round loop. If it is easier, turn the wire to the side so you can visibly see the round bend as you are making it. The round nose pliers are used to shape the circular shape by twisting the wrist forward. When you first start, you will be holding the pliers with your thumb facing up,and as you begin to roll the wire into a circle, rotate your wrist so that your thumb ends up facing downwards.
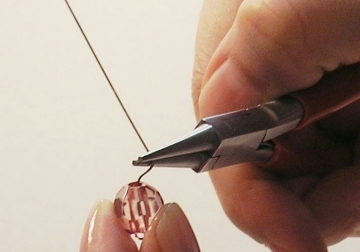
In the picture below I have already rotated my wrist to get the first half of the round loop. I will then grasp the end of the wire, and pull it down and around the round nose pliers to complete the loop. Cut the wire where the loop closes. Don't worry if you don't get it right the first time, practice will help!
Rotating my wrist to make a loop:
Look at your loop, and adjust it with either set of pliers (squeeze the loop closed if you need to, or use the round pliers to round the shape back out and center it over the bead a little better). Snip off the excess wire with your flush cutters.
Pulling wire down and around to complete the round loop. Cut off excess wire where it joins the other wire and top of the bead:
You can open the loop a bit to attach it onto your component, then squeeze it shut again with your flat nose pliers. Make sure you open loops by separating and pulling the wire side-to-side and not by spreading it open and apart at the top (you will mess up the circular shape of the loop).
I have attached my loop to an earring component, and--ta dah! One earring is complete!
Click here to Download and Print this Page
Note, you will need the Adobe Acrobat Reader software. If you need Acrobat Reader for your computer, you can download it for free.
More Wire WrappingIf you want to get really serious about wire wrapping as a home jewelry business, then I suggest that you visit Preston Ruether's wire sculpture website at wire-sculpture.com. This highly successful training course and system is being used by jewelry designers in more than 80 countries. Lorri's Book Reviews for Wire Wrapping
Learn more about wire wrapping, including more advanced designs by purchasing some books for your personal library. Listed below are three books that I own and can recommend, but there are obviously lots more out there. Happy reading!
| |||||||
Home How To Make Jewelry Jewelry Basics Jewelry Projects Designer's Gallery Jewelry Supply Jewelry Business Jewelry Books and More Contact Me Privacy Statement Copyright 2006 Smart Sisterz LLC |
What's New?
Hot off the presses! - Start Your Own Home Jewelry Party Business Today!
Wire wrapping continues to be a successful trend in jewelry design for 2006. Try wrapping some soft wire around a favorite focal bead in a random pattern for a truly one-of-a-kind pendant design.
Join our Newsletter for more free jewelry design projects and tips each month!
